

Three steps to get you ready
To start receiving bookings, you need an account, your first experience live, and your payment details configured. Our Vendor Success team can walk you through both.
Create your account
Sign up and complete the registration form with your business details.
Create your account →Create your first experience
Add it from the Experiences section of your dashboard. Our team reviews it and makes it live once approved.
How to add experiences →Add your payout details
Set up your payment information in the dashboard so payouts run smoothly from your first booking.
How to add payment details →The standards behind every experience
Guests book through Localbird because every experience is reviewed. These are the requirements every vendor meets, and the qualities we give priority to.
From listing to payout
Five stages, with our team supporting you at each one.
- 01
Onboarding
You upload your experiences; we optimize the content.
- 02
Booking
Guests book through the platform or a concierge.
- 03
Approval
Confirm availability within hours via WhatsApp or the dashboard.
- 04
Fulfillment
You deliver the experience; we provide real-time support.
- 05
Payment
Payouts by bank transfer, PayPal, or digital wallets.
Where bookings come from
Your main control center
The dashboard gives you a bird’s-eye view of your business on Localbird. These are the main things you’ll do there.
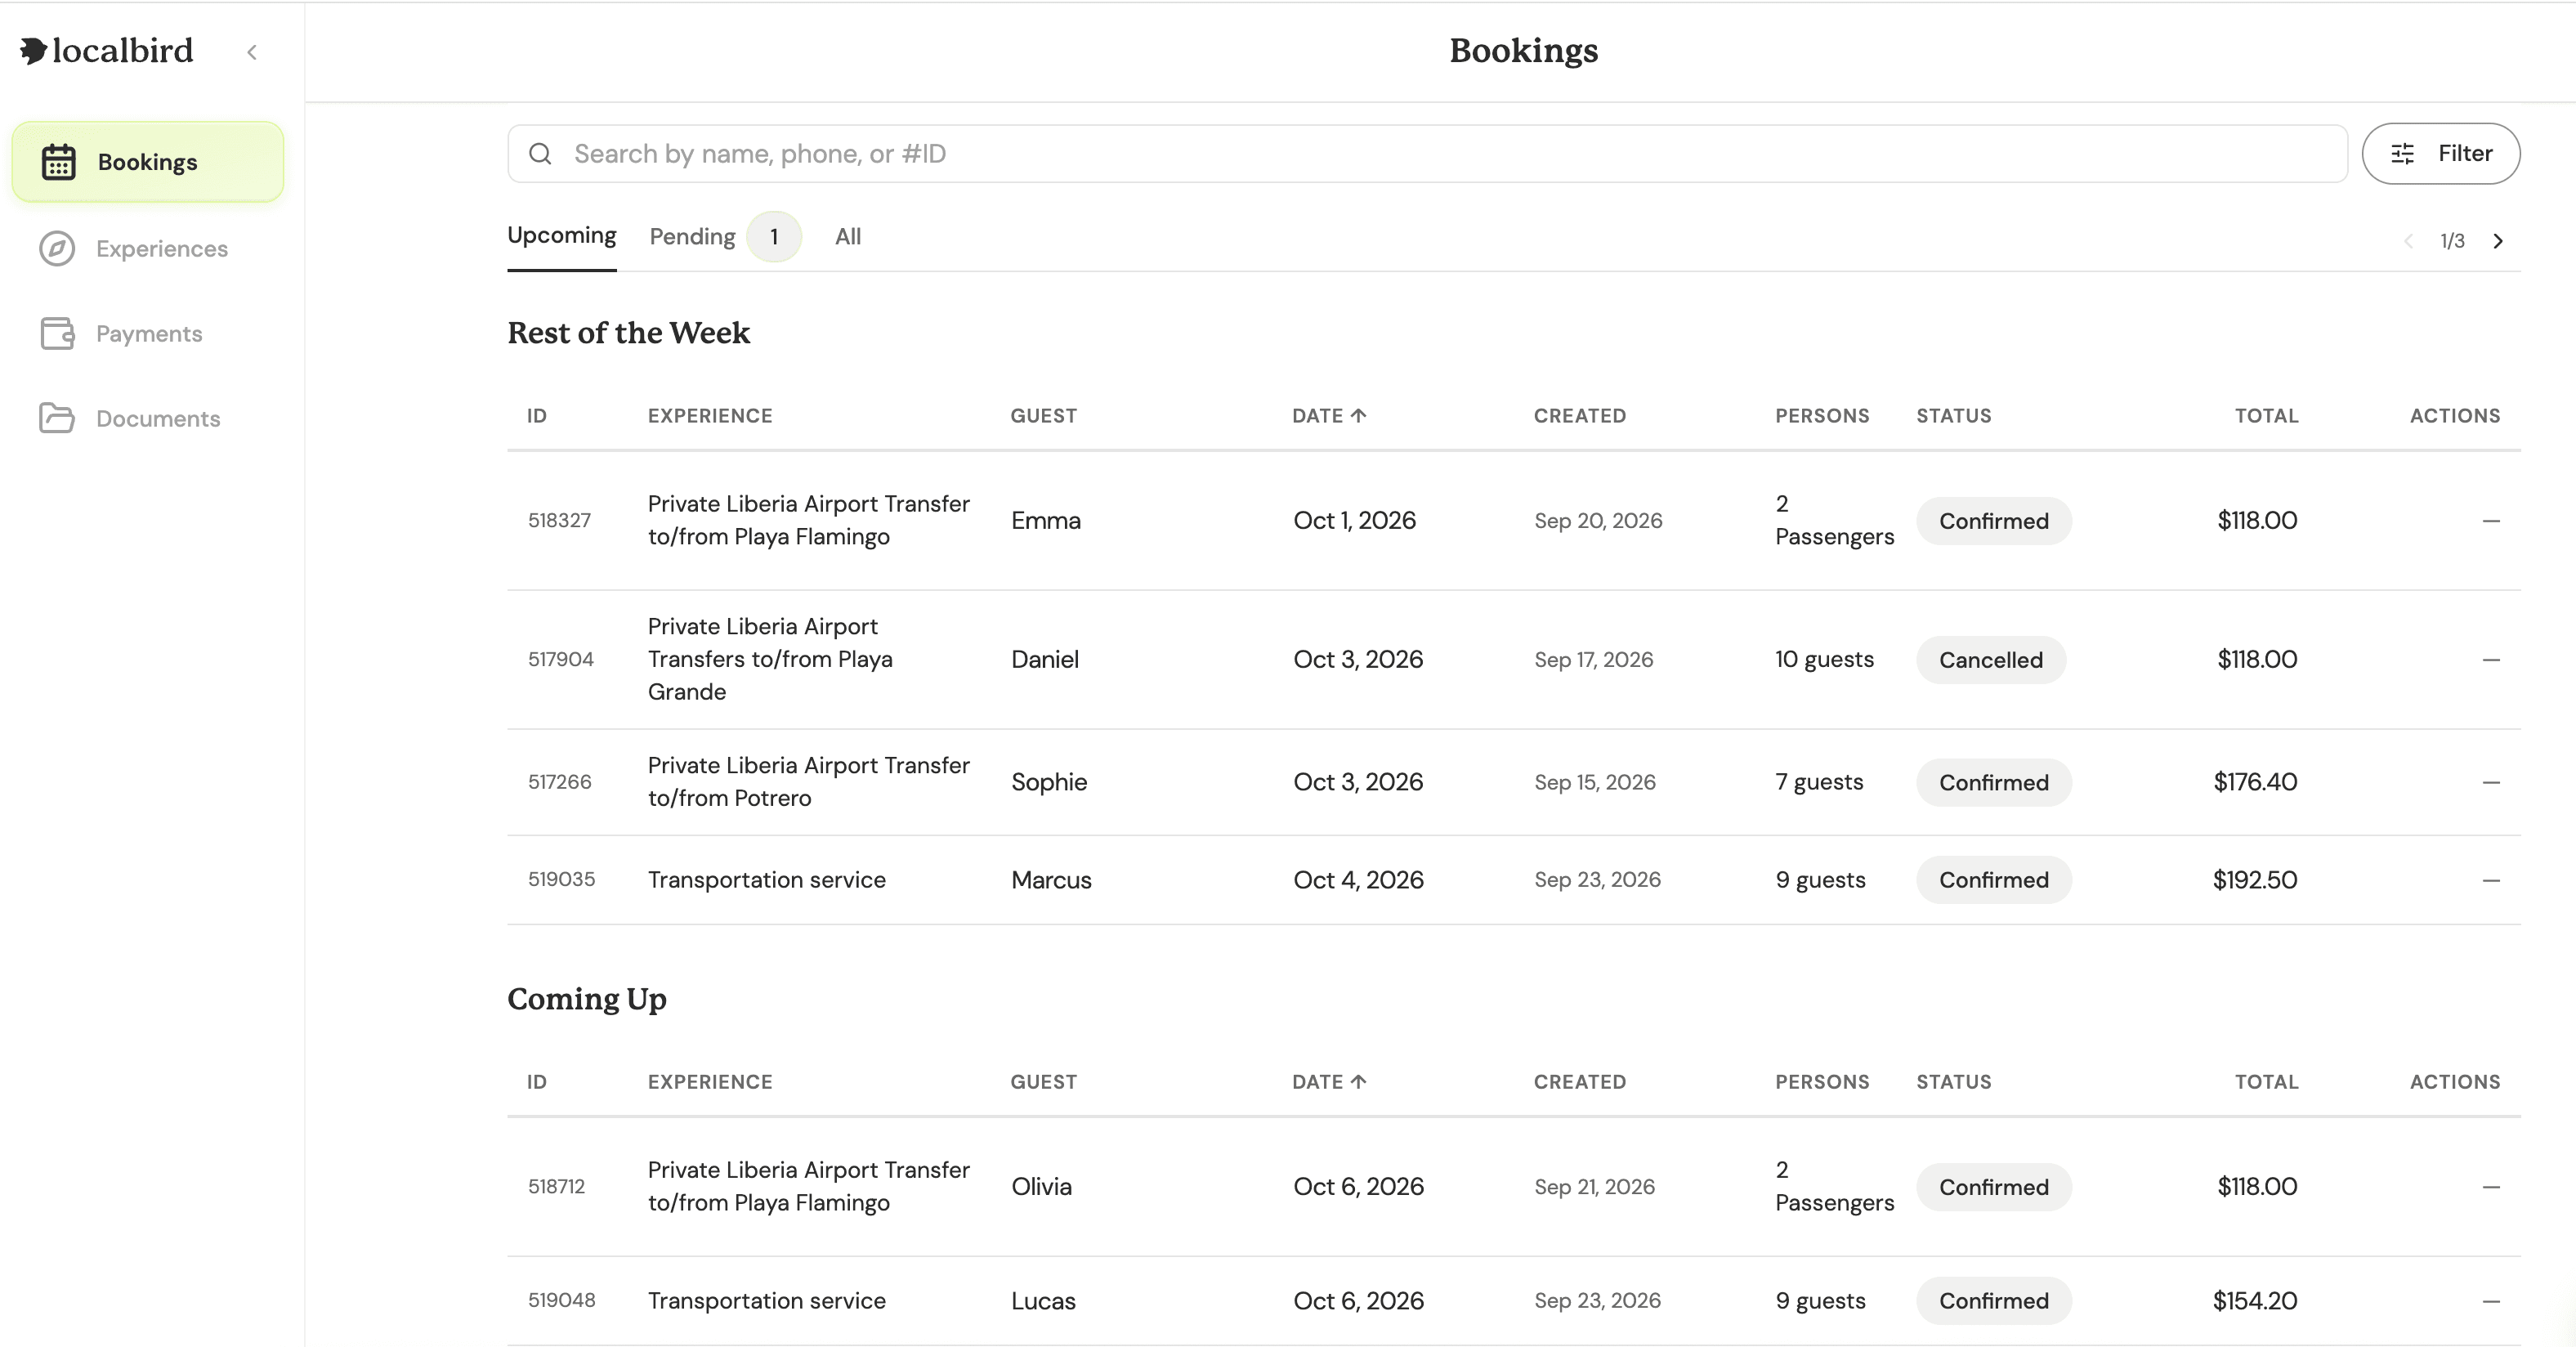
Bookings
View new, upcoming, and past bookings in one place.
Requests
Confirm or reject booking requests as they come in.
Experiences
See your listed experiences and add new ones.
Payments
Add and manage your payout details.
From request to confirmed
Every booking follows the same three steps.
A guest books your experience. You’re notified immediately by email, WhatsApp, or the Vendor App.
Check the date, time, number of guests, meeting point, and price before taking action.
If you reject, give a clear reason so we can help the guest — or contact our Guest Experience team on WhatsApp.
Good to know
The guest’s name, phone number, and email become visible only after you approve the booking.
Tip
Manage bookings directly in the Vendor App for faster handling.
The 2–3 hour window
Bookings must be confirmed within 3 hours to ensure a premium guest experience. Fast, reliable vendors rank higher and get more bookings.
Calls from our AI agents
To keep bookings accurate, Localbird AI agents may contact you to:
Verify availability
Check in real time that a slot is open.
Confirm details
Double-check the reservation details with you.
Fill in the gaps
Complete any missing information.
What success looks like
Vendors who approve quickly, keep info updated, set up products accurately, and maintain good reviews get:
Higher visibility
More featured positioning across the platform.
Better conversion
More of your views turn into bookings.
Priority placement
Top spots in our internal lists.
How to add a new experience
Navigate
Go to the Experiences section and click “Add new experience”.
Complete the info
Fill in every required field — description, duration, pricing, availability, meeting point details, and special requests. Make sure it’s all accurate.
Submit
Our team reviews the setup and makes it live once approved.
Need to change something in an existing experience? Let us know and we’ll update it for you — edits can’t be made directly from the dashboard yet.
How to add your payment details
Set up how you’d like to be paid so payouts run smoothly from your first booking.
Bank account
Direct transfer to your account.
PayPal
Paid to your PayPal email.
Log in
Sign in to your vendor account.
Navigate
Go to the Payment section.
Choose your method
Select your preferred payment method and enter your details.
More ways to be found
Beyond your listing, we actively put your experiences in front of guests.
Internal cross-selling — “guests who booked X also booked Y” — drives additional volume to your experiences.
We’re here at every step
Our Vendor Success team is available to support you. For anything specific, reach the right team directly.